Using your own Kafka broker
Using Your Own Kafka
If you have a Kafka broker accessible from the internet, then you can configure tenefit.cloud to stream data from it. If you don't have a Kafka broker available, don't worry, you can use our sandbox Kafka broker (the instructions are further below).
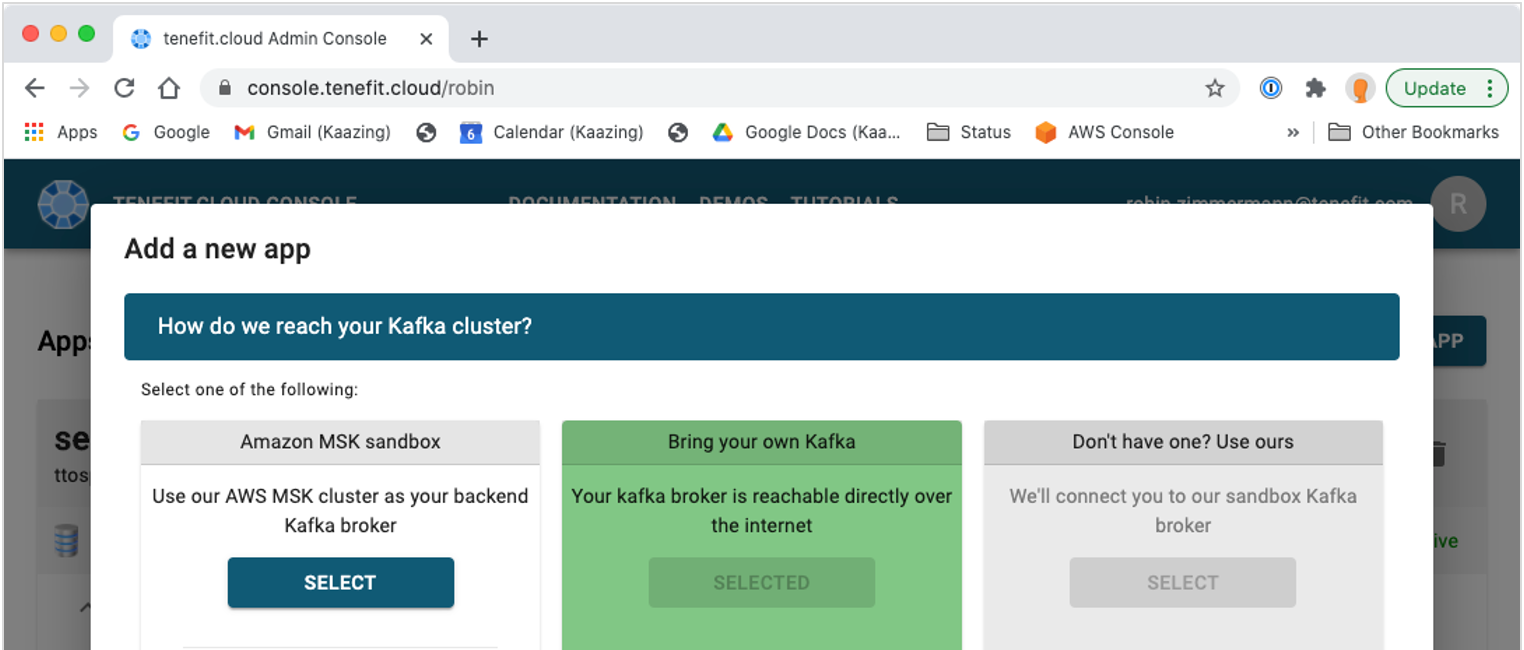
To use your own Kafka broker cluster, from the tenefit.cloud admin console, click the Add a new app button at the top of the screen:

In the Add a new app dialog, select the Bring your own Kafka option:
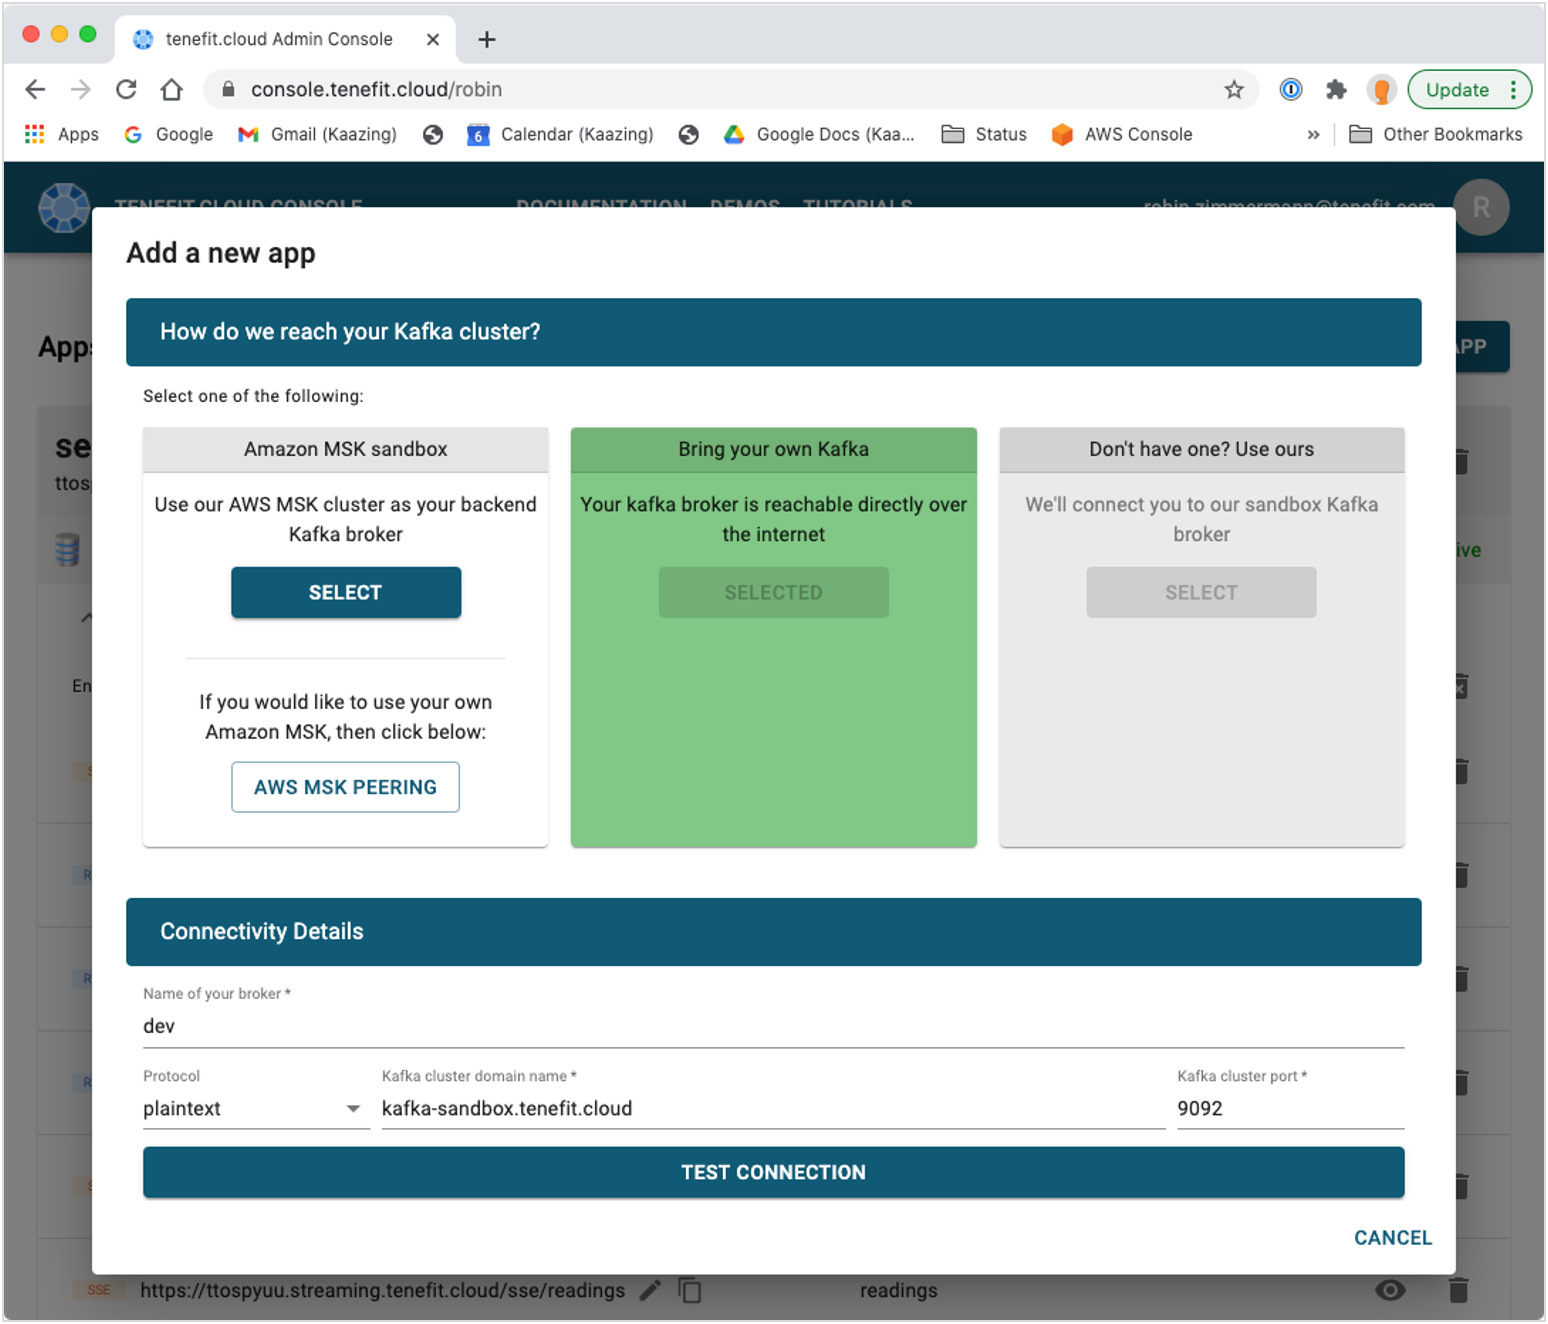
Then enter a nickname for this Kafka broker or Kafka broker cluster. The nickname can be whatever you like. It is only used in the tenefit.cloud admin console to help you remember which app configurations are using which broker.
For the Protocol, choose the setting that matches your Kafka configuration. If it allows plaintext connections, then choose plaintext. If it requires SSL connectivity, then choose ssl.
Note
For more information on configuring SSL (TLS), or server certificates, or client certificates, see Connecting to Kafka in the documentation.
Next enter the hostname or IP address for your Kafka broker or Kafka broker cluster, and then enter the port. If you don't have a Kafka broker available, then use our broker, which is kafka-sandbox.tenefit.cloud on port 9092.
At this point, your screen should look something like this:
When you're ready, press the Test Connection button to validate your connection details:
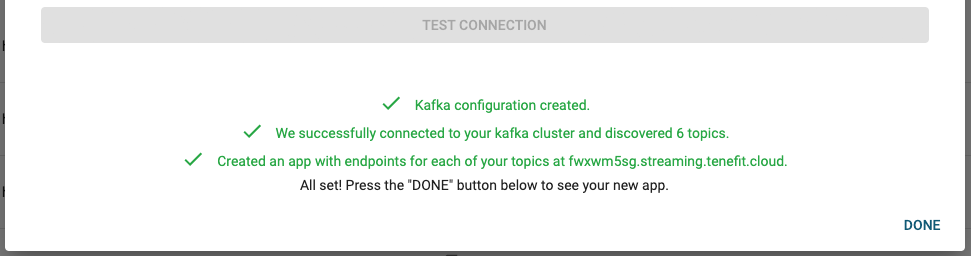
Once the test is successful, press the Done button and you'll see your new app configuration:
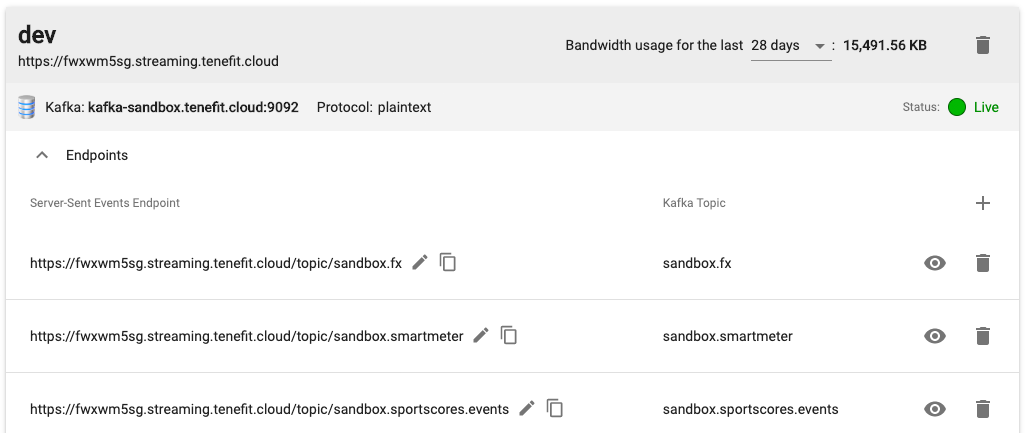
You will see the domain you've been allocated, as well as a default topic mapping for each topic.
Now you can use this app configuration in your client application, as you've already seen earlier in the Intro to tenefit.cloud tutorial.
Adding a New Topic Mapping
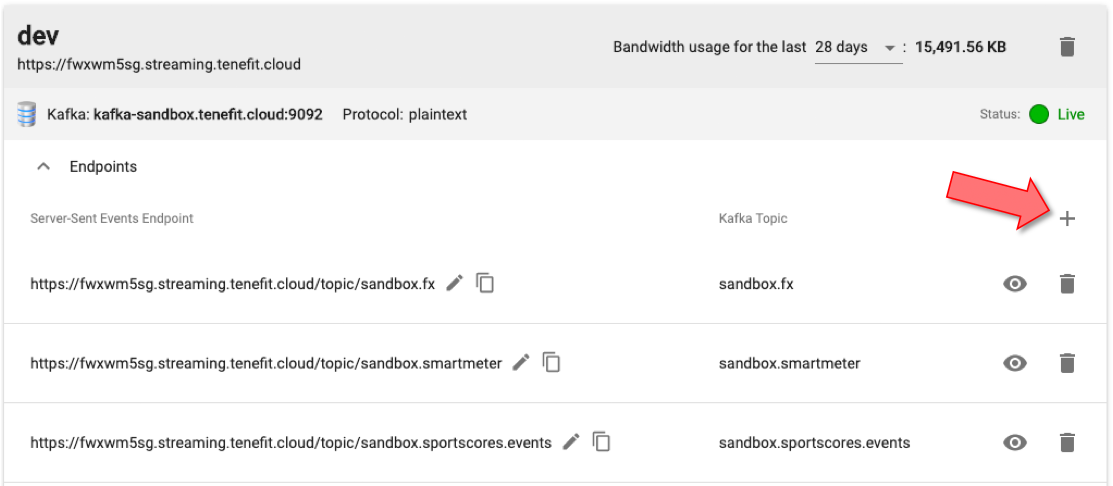
Press the + button to add a new topic mapping:
A row will appear. Select sandbox.sportscores.events for the topic. This will default the path for you, which you should override and change to events:
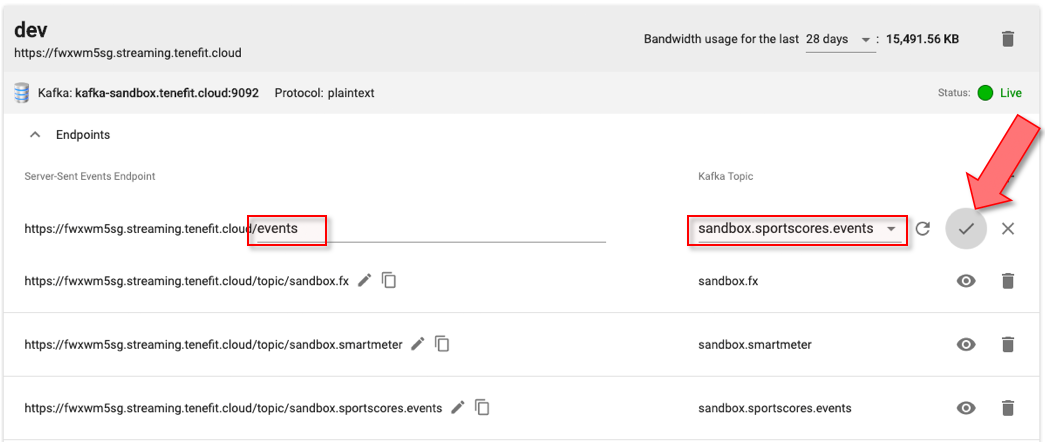
Press the save (✓) button.
Note
Notice that the status changes to updating because modifications to the app configuration are live and need to be provisioned each time you make a change:
The change will have taken effect once the status is live:
You can continue to make other app configuration changes while the status is updating. You don't need to wait until the status is live before making more changes.

Once the change is provisioned, you will have a new endpoint availble for an application to use.
This shows a couple of things:
Kafka topics can be used by more than one topic mapping, since two topic mappings are using the
sandbox.sportscores.eventstopicThe path in the topic mapping is independent of the topic name. The first three topic mappings that were automatically created for you simply used the topic name in the path name. However the path can be anything that conforms with valid URL names
Deleting a Topic Mapping
The first two topics in our list will show the same data. This can be seen by expanding the live data view for both of them:
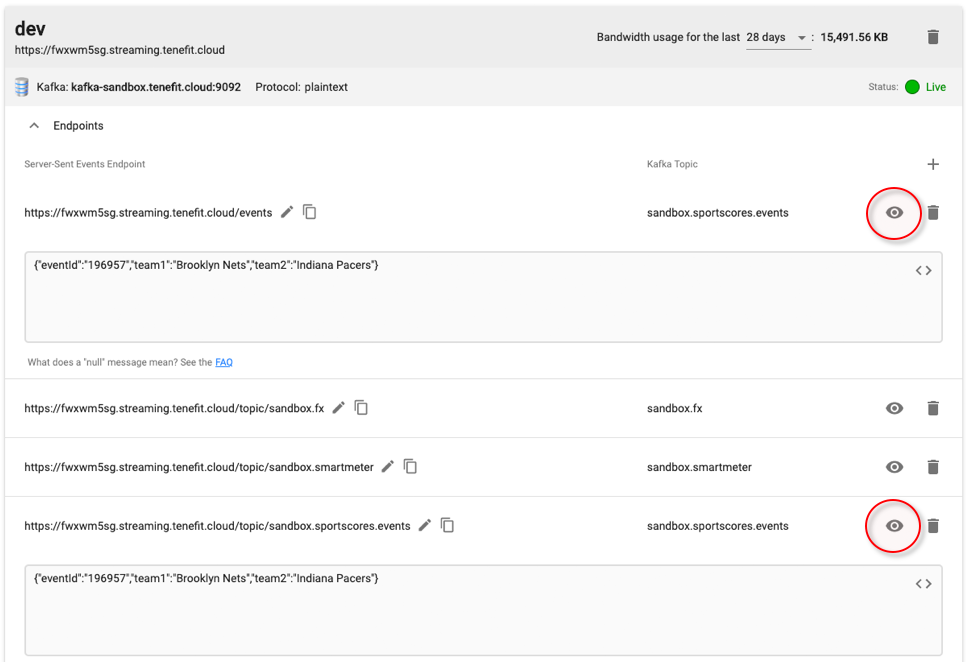
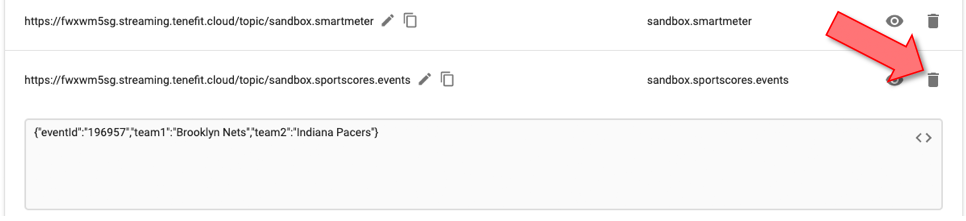
Since we don't need both of them, let's delete one. The path /events is a better name, and doesn't expose the name of our topic to the client application, so delete the topic mapping for /topic/sandbox.sportscores.events:
Once again, the status will show that the changes are updating, and will be provisioned when the status is live:

Updating a Topic Mapping
Let's also change the path for the /topic/sandbox.sportscores.scores to /scores. Click the edit button next to the path:

Change the path to /scores and press the save (✓) button. As usual, the changes will be live once the status is green. Here are the topic mappings now:

Using Different Domains
If you have multiple configurations, you'll see that each app configuration has a different domain:

In the example, above, the sandbox app configuration has a domain of:
2oh1lmtk.streaming.tenefit.cloud
while the dev app cofiguration has a domain of:
fwxwm5sg.streaming.tenefit.cloud
Generally speaking, you'll probably want one app for each different Kafka system. For example, you may have one Kafka cluster for DEV and another for PROD. An application can subscribe to whichever of the SSE endpoint URLs it wants to use. For instance, perhaps during the development, your application will use the dev URLs, and in production, the application will use the prod URLs.
Another reason to have different apps with different domains is because you have multiple client applications with different functionality. For example, one application may do sport scores, while another shows stock prices. You can separate their data needs by using different apps with different domains.