Intro to tenefit.cloud
This tutorial walks you through the steps to use tenefit.cloud for the first time
In the tutorial you will use a sandbox Kafka broker that has been supplied for you. If you have your own Kafka broker that you'd like to use, the Using Your Own Kafka section towards the end of the tutorial has steps for that.
Register for tenefit.cloud
You start by registering at https://console.tenefit.cloud
It's free, and you don't have to enter any credit cards to get started.
Note
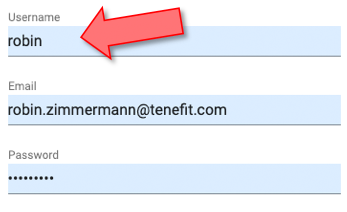
When signing up, pick a username that is URL-friendly as it will be used in the tenefit.cloud Admin Console URLs. This is similar to way GitHub puts your username in its URLs.
tenefit.cloud administration Console
Once you've signed up, you will have access to the tenefit.cloud administration Console. That is where you configure everything you need for your client applications to be able to receive streaming data from Kafka.
Developer Intro
There is some help text in the Developer Intro section. If you dismiss the help, it can always be shown again using the Show Developer Intro button near the top of the screen.
Status
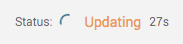
When first sign up a new instance will be created for you, which may take a few minutes.
Notice that the status on the right says it's updating:
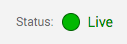
Whenever you add or modify an app configuration, the change needs to be provisioned in tenefit.cloud. You'll know it has taken effect once the status is live:
The App List
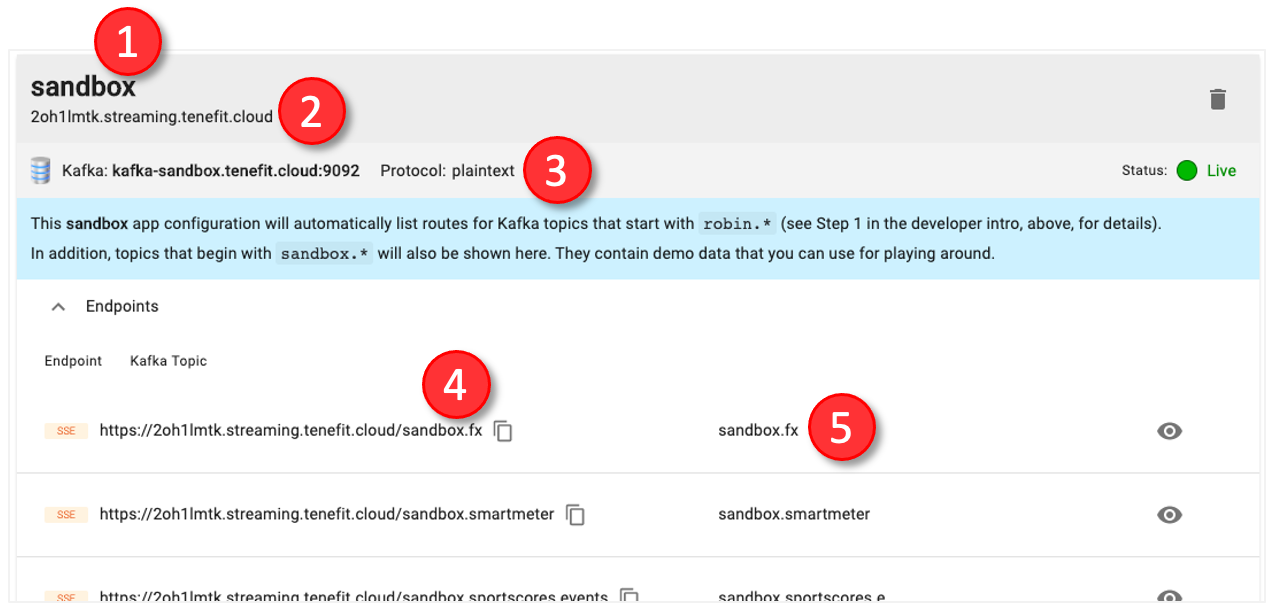
Whenever you log in tenefit.cloud Administration Console, you'll see your list of apps. An app, in the context of tenefit.cloud, defines the configuration mapping between your backend Kafka broker and your client application.
One has already been created for you called sandbox.
App Configuration
An app configuration defines:
- A nickname to help you remember what this app is for
- The domain name used in the streaming URLs
- The connection details and status of the Kafka broker cluster
- The Server-Sent Events (SSE) endpoint URLs that your client applications will use to stream data
- The topics used by the endpoint URLs
Viewing the Data
Once your app configuration is ready, you can start looking at the data and verifying it's what you expect.
There are various ways you can see the data, two of them are described here in the tutorial.
Live Data Preview in the Console
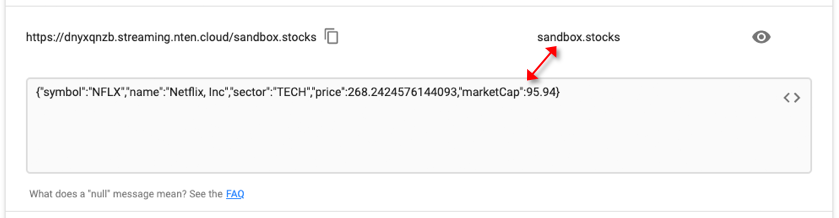
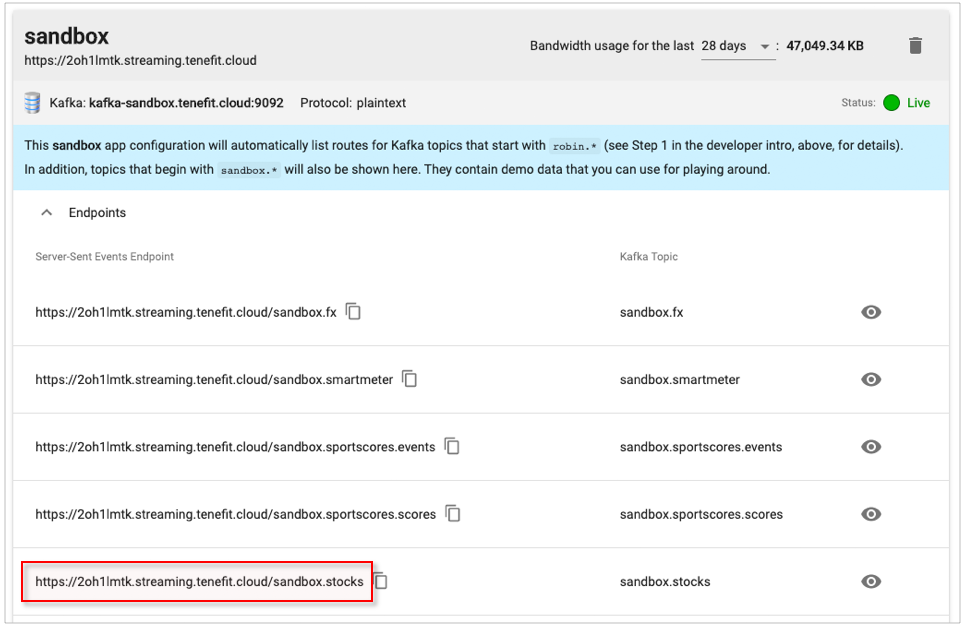
Click the Show Live Data icon on the right-hand side of the /topic/sandbox.stocks row:
![]()
This will show live messages from the sandbox.stocks topic as they are published into Kafka. Behind the scenes, we are running a publisher that is sending messages into the sandbox Kafka so that you have some test messages here:
Note
To hide the live data preview, click the Show Live Data icon again.
Code Template for Javascript
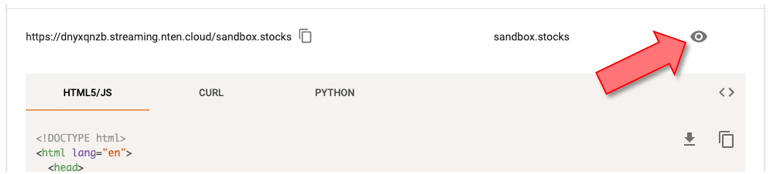
Click the Show Code Template icon:
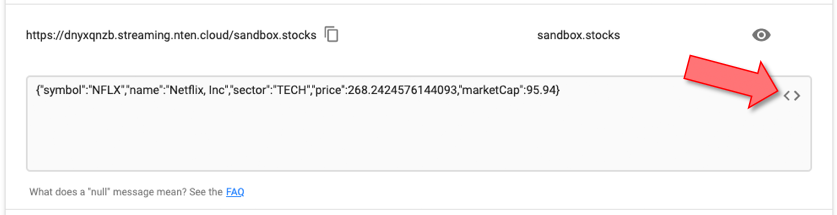
This will show you a HTML and Javascript code template that streams the data into a HTML5 application.
Press the download button and use a browser to open the HTML file that was saved. You can click on the download directly if your browser supports it – like the screenshot below – otherwise open it yourself from wherever you saved it.
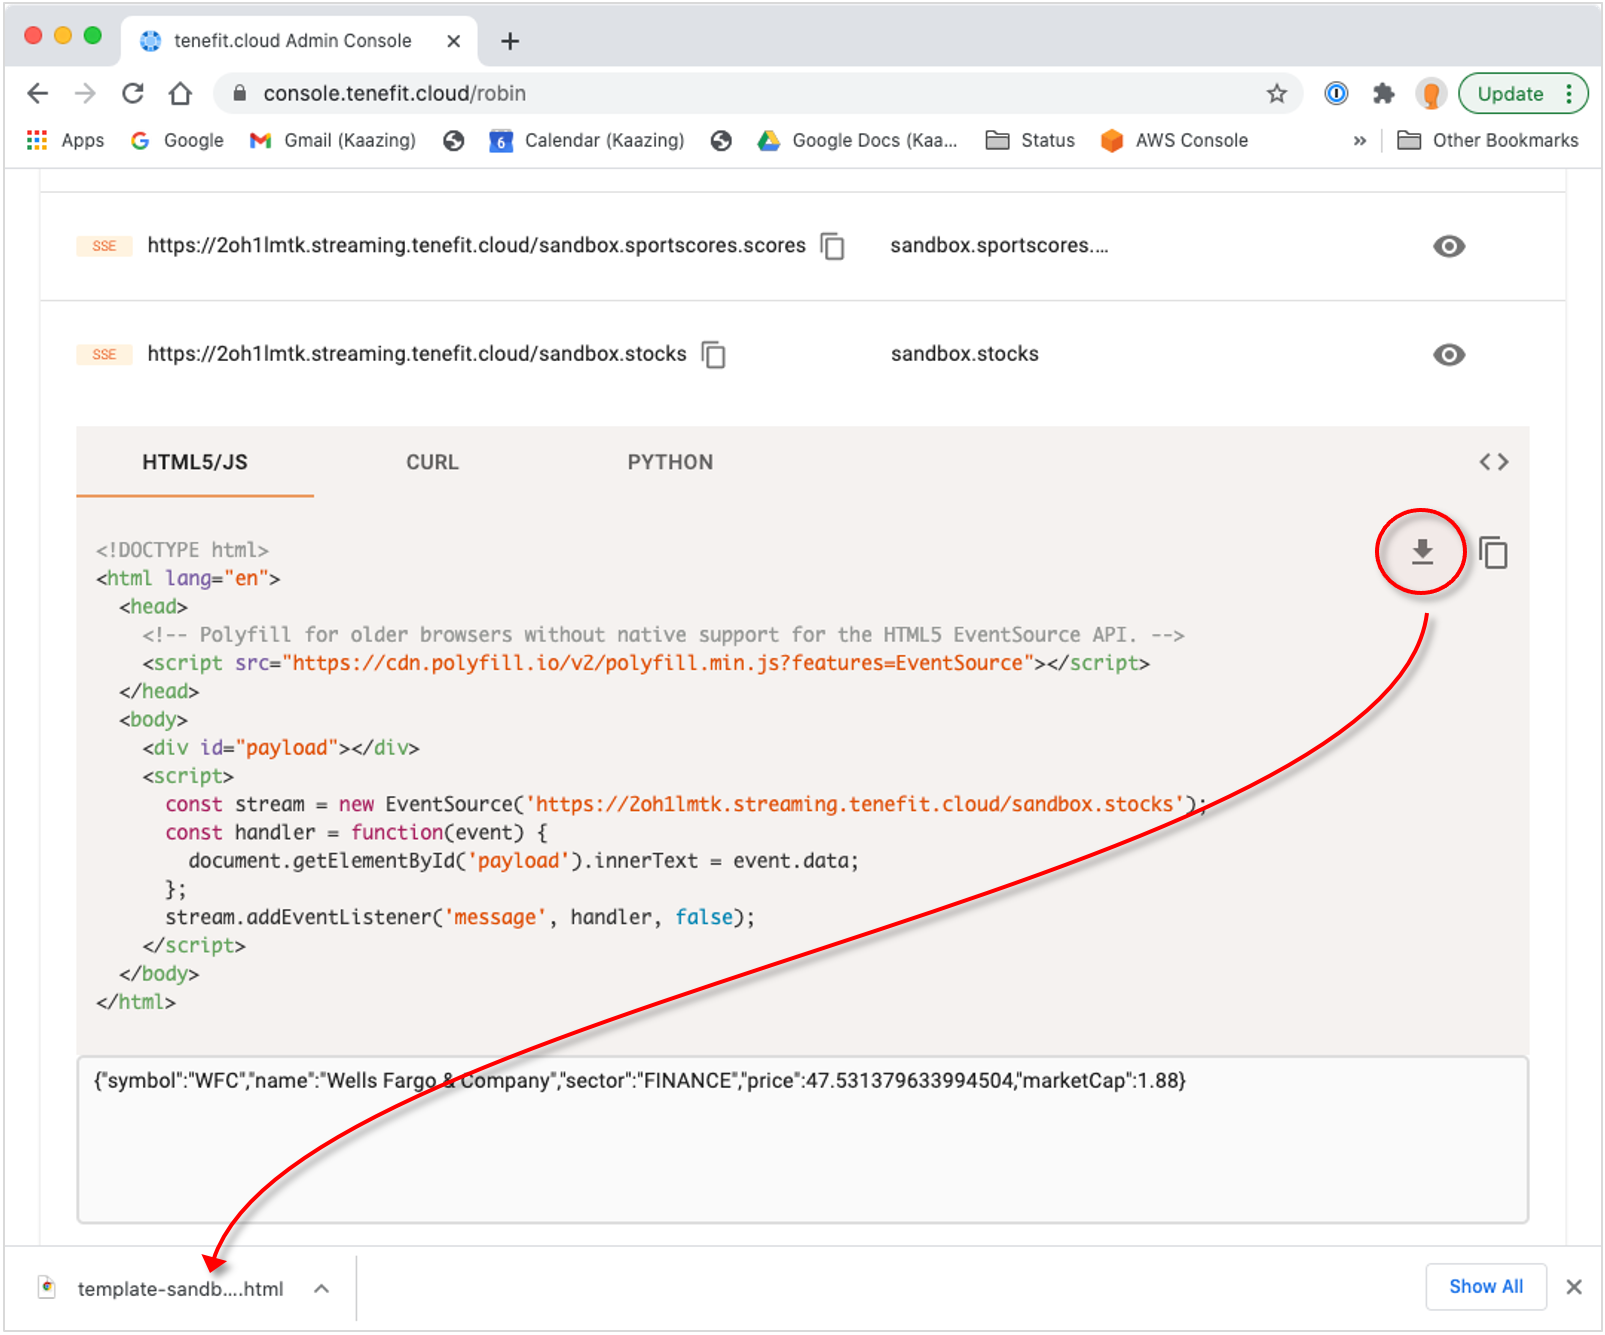
Alternatively, you can copy the text with the copy-to-clipboard button and save it to a .html file, which you can then open in a browser:

Whichever method you chose, once you open the template application in a browser, you will see the messages displayed on the screen:

You can view the source to see the entire application.
This template shows how you can easily stream data into your own application. We'll go into more detail on that later in the Creating Your Own Application section.
Understanding the App Configuration
Close the live preview:
You should now see your configuration again. Right now you only have one app configuration, called sandbox.
App Domains
An app configuration is a grouping of Server-Sent Events (SSE) endpoint URLs. Your client application will connect to those URLs in order to stream data from Kafka. All of the URLs have the same domain address with a different path.
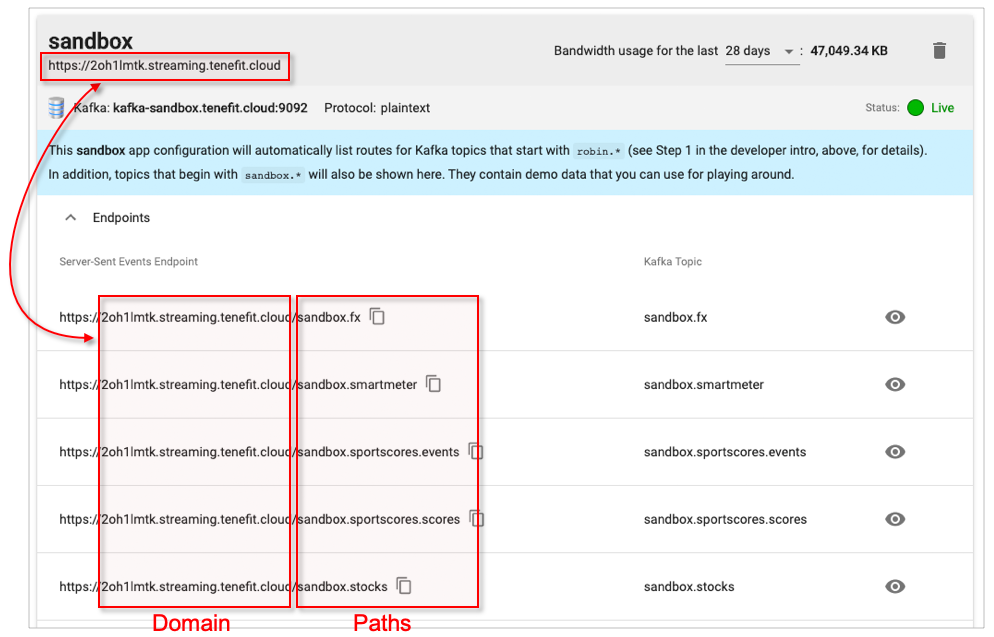
Notice that all of the URLs above have the same domain address, namely, in this example: 2oh1lmtk.streaming.tenefit.cloud. As a convenience, the domain is also shown in the header section of the app configuration.
tenefit.cloud will dynamically allocate you a domain that you can use.
Note
In a production environment, you can choose your domain, such as
streams.myapp.example.com.
If you were to add a new app configuration – perhaps for a different client application – it will have a different domain. We'll do this further down in the tutorial.
Server-Sent Events (SSE) Endpoint URLs
These are your SSE endpoint URLs, each mapped to a specific Kafka topic:

You map each stream of data you want clients to receive to different paths. Consider the following two SSE endpoints:
https://2oh1lmtk.streaming.tenefit.cloud/topic/sportscores.events
https://2oh1lmtk.streaming.tenefit.cloud/topic/sportscores.scores
The first one will stream messages when a sporting event starts or stops, so you know which games are currently being played. The second URL will stream score updates for those events.
As you can see in the list of endpoint URLs, the first URL is mapped to the sandbox.sportscores.events Kafka topic, and the second one is mapped to the sandbox.sportscores.scores Kafka topic.
You can use the tenefit.cloud admin console to configure any path you like to whichever topics you like. You can delete topic mappings that you don't want, or you can click the edit icon to modify the path.
Note
The sandbox app configuration has been simplified and doesn't allow modification of endpoints. But when you create your own app config you will be able to do that. See the Using your own Kafka broker tutorial.
Creating Your Own Application
Back in the Code Template for Javascript section, you saw how to get a code template for any of your topic mappings.
Starting With the Code Template
Let's break down that code template so you can see how to easily receive streaming data in your own applications. Firstly, here's the whole template we looked at, and then we'll review some of the key lines:
<!DOCTYPE html><html lang="en"><head><!-- Polyfill for older browsers without native support for the EventSource API. --><script src="https://cdn.polyfill.io/v2/polyfill.min.js?features=EventSource"></script></head><body><div id="payload"></div><script>const stream = new EventSource("https://2oh1lmtk.streaming.tenefit.cloud/topic/sandbox.stocks",);const handler = (event) => {document.getElementById("payload").innerText = event.data;};stream.addEventListener("message", handler, false);</script></body></html>
Supporting Older Browsers
Some older browsers don't have native support for Server-Sent Events, so include a polyfill:
<html lang="en"><head><!-- Polyfill for older browsers without native support for the EventSource API. --><script src="https://cdn.polyfill.io/v2/polyfill.min.js?features=EventSource"></script></head>…</html>
By adding this one-line polyfill, your application will work in any browser. You don't need to take any other action or do anything differently in your application. The polyfill only activates if it detects the browser does not support Server-Sent Events; in a modern browser, the polyfill will be ignored.
Creating the EventSource
Server-Sent Events use the standard HTML5 EventSource API. To subscribe to an event stream, create a new EventSource and pass in the URL:
<html lang="en">…<body>…<script>const stream =new EventSource('https://2oh1lmtk.streaming.tenefit.cloud/topic/sandbox.stocks');…</script></body></html>
The URL comes directly from the tenefit.cloud admin console:
Setting the Message Handler
You won't receive any data, until you add a handler for the message event:
<html lang="en">…<body>…<script>const stream = new EventSource("https://2oh1lmtk.streaming.tenefit.cloud/topic/sandbox.stocks",);const handler = (event) => {document.getElementById("payload").innerText = event.data;};stream.addEventListener("message", handler, false);</script></body></html>
message is the default EventSource event. (It's possible to add handlers for other events, too, which we won't cover here.)
In this case, when the handler receives a message of type message from the event stream, it writes to a <div> on the screen:
<html lang="en">…<body><div id="payload"></div><script>const stream = new EventSource("https://2oh1lmtk.streaming.tenefit.cloud/topic/sandbox.stocks",);const handler = (event) => {document.getElementById("payload").innerText = event.data;};stream.addEventListener("message", handler, false);</script></body></html>
In your application, you can decide how you want to handle messages you receive. They can be drawn to the screen, used in a calculation, or used in any other way.
Next Steps
Congratulations! Now that you understand the basics of using tenefit.cloud, continue on to see more tutorials, or try some demos.